Author Archives: Kat H

Cressoway! (Dallida?)

It’s time for a mash up! Yeah yeah!!

Pinky bar Cressoway dress | Modern Vintage Cupcakes

Back in September, I made a dress for Sewing Indie Month using two Jennifer Lauren Vintage patterns – the Dalloway dress and the Cressida skirt. I combined the bodice of the Dalloway with the Cressida skirt to make a cute vintage styled fit-and-flare dress. (And I put together a tutorial on how to do it on Jennifer’s blog. Spoiler alert: it’s a super easy pattern hack.)

Jennifer Lauren Vintage Cressida skirt line drawing

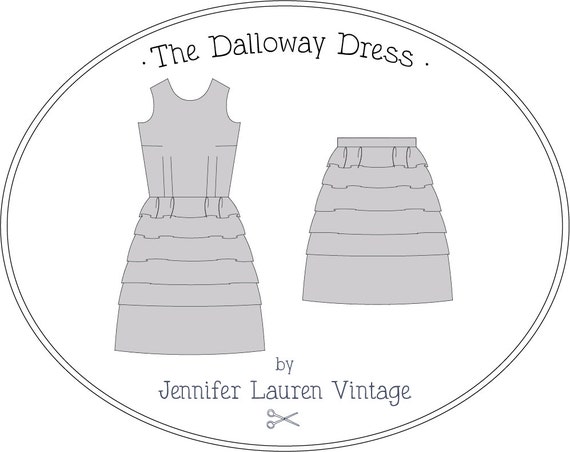
This was my first time making any Jennifer Lauren Vintage patterns, and I have to say, it was a lovely experience! Great instructions, good diagrams, notches that all match up and do what they’re meant to do, and a clean and easy way to line a bodice. I now have my eye on her Enid top pattern to add to my “things to sew” list… πŸ˜‰

Pinky bar Cressoway dress | Modern Vintage Cupcakes

Jennifer drafts for a D-cup bodice, and I’m an AA, so naturally there had to be a bit of adjusting before I could begin. I chose my size based on high bust measurements then did a 3″ SBA (small bust adjustment) to bring it down to an A cup. Since there were two waist darts, I rotated them into one dart and then did a SBA on the bodice to make it easier. The SBA resulted in the side bust darts and one of the waist darts on the bodice being removed. (A shame, as I really like the double waist dart detail in the Dalloway bodice. But hey, if I’d kept them both, they would have been little more than pintucks. πŸ˜‰

Here’s my hacked-up bodice post-SBA….

bodice alterations

I also added 1cm of length to the front and back bodice (a common adjustment for me, due to my height.)

Fit adjustments made to the bodice, I started asjusting the Cressida skirt to convert it from a separate with button front opening to a dress skirt with centre back zip. You can find all of these over on the Jennifer Lauren Vintage blog, so I won’t go into the details here as well. (Although if you have any questions, feel free to ask.)

Pinky bar Cressoway dress | Modern Vintage Cupcakes

The other key change I made was leaving out the pockets. (Yes, yes, I know – that decision just seems downright wrong! But there’s a good reason for it – I wanted to leave it easy to take this in at the waist in the future, and the pockets would have made it very hard to do that. So they got left out, and the side seams got stitched up last, rather than the waist seam.)

Pinky bar Cressoway dress | Modern Vintage Cupcakes

I really love the resulting dress – it’s fun and swirly! The Cressida skirt is a semi-circle, which gives a good amount of fullness while not being too nervous about errant breezes (a common wardrobe malfunction here in Wellington. Wonder why wind gets mentioned on Wellington sewing blogs a lot? We’ve just officially been announced the windiest city in the world. Yeah.). I like how the neckline on the Dalloway dips down at the back, and how the bodice is fully lined in an easy and clean way. The combination of patterns results in a dress that’s a good blank canvas for all sorts of fun prints and patterns.

Pinky bar Cressoway dress | Modern Vintage Cupcakes

Speaking of prints and patterns – the fabric I used for this came from Fabric-a-brac a while ago. It’s a cotton, with a lovely mottled pink design all over it. I paired it with a lightweight yellow poplin for the bodice lining, and used yellow Hug Snug to bind all the seams. The hem is finished with Hug Snug and stitched with a blind machine stitch.

Pinky bar Cressoway dress | Modern Vintage Cupcakes

Pinky bar Cressoway dress | Modern Vintage Cupcakes

One thing you may spot that’s a bit odd – the zipper is a super crazy long one. I got given a bunch of these a while back, and it turned out I didn’t have any suitable coloured zips the right length in my stash (considering how many zips I own, I have no idea how this could have happened…). For some reason, I decided that rather than shortening the zip, I’d just make a super long lapped zip. And no, there was no good reason for this decision – I just felt like it. *shrug* So yes, this dress has a lapped zip that goes nearly the whole way down the back. (Can you spot where it ends in the photo below? Please ‘scuse the wrinkles – this dress had already been through High Tea and lots of walking and sitting.)

Pinky bar Cressoway dress | Modern Vintage Cupcakes

The photos for this were taken at the house of one of my fellow members Wellington Sewing Bloggers Network (WSBN), after we went for high tea. We all had outfits to photograph – so much fun when we’re all getting garment photos and egging each other on! πŸ˜‰ Just for fun, here’s a few behind-the-scenes photos. Including swinging. Because, swings.

Pinky bar Cressoway dress | Modern Vintage Cupcakes

Pinky bar Cressoway dress | Modern Vintage Cupcakes

Pinky bar Cressoway dress | Modern Vintage Cupcakes

Taking photos of Mel in one of her new dresses. πŸ˜‰

Pinky bar Cressoway dress | Modern Vintage Cupcakes

Mel and Nina in new dresses!

We spotted this on the way to Nina’s house for photos – isn’t is amazing? All covered in wooden lace work, including the fence out the front.

laceHouse

Summer dreaming….

When I was browsing the Minerva Crafts website a while ago, my eye got caught by this fabric. Believe it or not, it’s a Liberty lawn! One that isn’t super floral!! I’ve always wanted to try sewing with a Liberty fabric – it’s not something you tend to come across over here in New Zealand, and after reading so many posts by overseas bloggers who rave about it, my curiousity was well and truly piqued. But sadly, I’m just not that into busy floral prints, and most of the designs, while lovely on others, weren’t “me”.

Until this one. Ain’t it fantastic?!? It’s called “Hidden Floral” – yep, there are flowers in it, but they’re all hidden in the print. Pinks and greens and blues and oranges, what a fantastic riot of colour, while at the same time appearing almost subdued. (Not too sure how that works, but hey.)

Summer Dreaming halter dress - Modern Vintage Cupcakes

So thanks to Minerva, who enabled my Liberty curiousity to be fulfilled. πŸ˜‰

When I spotted this print, I knew exactly what I wanted to make it into as well. I’ve had this vintage 1950’s halter neck dress pattern in my stash for a while, waiting to be made up. It features a button-front, side zip, and dramatically pointed collar. As well as pockets. And oh my gosh, what epic pockets they are! Check out the hugeness of them!! And the pocket flaps!!! They’re pockets perfectly designed for swanning around on a summers day, concealing all manner of lip balms and cell phones and entire blocks of chocolate where no kids can see you’re carrying candy and sneakily eating it when their backs are turned. (Not that I do that. Ever. *ahem*)

Summer Dreaming halter dress - Modern Vintage Cupcakes

The pattern is Butterick 5949, from around 1951. As stated on the back, it’s a “Halter Necked Day or Evening Dress. (A) The tailored look in a quick & easy evening or at-home gown. Halter neck, bare back bodice buttons down the front, has a perky collar. The full, dirndlish skirt flaunts two huge patch pockets. (B) Day length version.”

Summer Dreaming halter dress - Modern Vintage Cupcakes

Anyways – this fabric, that pattern. Perfect!

(Or maybe not perfect – in hindsight, a lawn is probably a little bit too lightweight for a halter neck dress like this. Although anything much heavier would result in a rather bulky waist, with the semi-circle skirt that is then gathered in…. Hmmm…. Perhaps a poplin? No matter, lawn it was, and as lawn it shall be worn!)

Summer Dreaming halter dress - Modern Vintage Cupcakes

The pattern needed a few modifications. First up, it’s a couple of sizes too small, at a 32″ bust. So I got my tracing game on, and made the following changes before cutting out the final fabric:

  • Graded up to a size 36″ bust / 42″ waist
  • Did a 1″ SBA (small bust adjustment) (so 1/2″ on the half bodice, to bring it to a total of 1″)
  • Lowered dart points
  • Lengthened the bodice by 3cm (possibly too long in hindsight, but I’ll get to that soon)
  • Narrowed the skirt a bit so it fit on the width of the fabric
  • Removed the side zipper and instead extended the front button placket (I have dreams of one day getting back to pre-baby-size, so all dresses are currently made in a way that side seams are easy to take in at some mythical point in the future)

Summer Dreaming halter dress - Modern Vintage Cupcakes

Changes made, and dress cut out, I got to sewing.

And let me just tell you – this Liberty lawn was all it was rumoured to be. Absolutely delicious to sew with – light and airy, presses well, doesn’t crease easily (except when you want it to), and holds it’s shape nicely while being sewn up. Gorgeous. *mini swoon*

The pattern, well, it’s a classic 1950’s pattern. Unprinted pattern pieces (they’re marked with punched holes instead, which are interpreted by a key. Which I find pretty easy to work with actually – it’s super easy to mark things with tailors chalk when there are conveninetly cut holes already in the pattern tissue!). And the usual sparse instructions. The instructions for the collar/neck facing confused me a little, so I just ignored them and did things my own way. πŸ˜‰

The way the collar is shaped on this is very pretty – it’s narrow at the back, and swoops into a strong point in the front.

Summer Dreaming halter dress - Modern Vintage Cupcakes

Summer Dreaming halter dress - Modern Vintage Cupcakes

I made a few changes as I went through the sewing fun as well, as follows:

  • Stitched the side seams last to make it easy to adjust them in the future
  • Put interfacing onto the self-facing of the front bodice, rather than directly onto the front bodice itself (it looks a bit softer that way)
  • Added extra button holes below the waist to compensate for having removed the side zip, and then stitched the remainder of the placket closed from the last button to the hem
  • Understitched the neck facing
  • Got lazy and didn’t slip-sitch the opening that the pocket was turned through closed. The pocket got top-stitched onto the skirt anyway, so I figured it wouldn’t make a difference

I finished the inside seams and the hem with pink Hug Snug rayon seam binding. Those little bursts of colour on the inside of garments just make me happy, it’s true. πŸ™‚

Summer Dreaming halter dress - Modern Vintage Cupcakes

Annoyingly enough, despite doing a quick-and-dirty muslin (the joy of using fabric for tracing onto – these days I just sew up my tracings of the pattern pieces as a muslin and then unpick them again to get the pattern back. So fast! So easy!), and trying the dress on a few times during construction, once it was finished I realised I needed to adjust the side seams. By quite a lot.

11cm, to be precise. Grading down to nothing at the waist.

Heck knows how that happened. Because that puts them back at a size 32″ bust, which I most certainly am not, and never have been. Oh well, such is life! Although with an adjustment that big on a halter neck, it does mess around with the curve of the neckline under the arm – somewhat annoying. But not insurmountable, so after a fair bit of unpicking and cutting and restitching, I now have a halter dress, all ready to wear this summer!

Yay, summer!!!

(Now, where are you, summer?!? Hurry up already!!)

Looks rather ideal for lounging around eating ice cream in, don’t you think? πŸ˜‰

Summer Dreaming halter dress - Modern Vintage Cupcakes

Summary / Details:
Pattern used: Butterick 5949 from around 1951
Fabric: Hidden Floral Liberty lawn, from Minerva Crafts (sadly now sold out, so I can’t link you to it)
Changes made: Lots! All listed above
What I’d change next time: Take in the side seams by 11cm in total (so 2.75cm at front and back side seams on the pattern) before cutting out the fabric; possibly raise the waistline by 1cm. I’m not 100% sure about this yet – the volume of the skirt pulls the waist down a bit lower than it should be, but I also have pretty much no waist definition at all at the moment (thanks, little babies. Yeah.), so it may be in part due to that. Will revisit in a few months. Hopefully.
Would I make it again? Hopefully! I’m loving this pattern, and especially those pockets and the as-described “perky” collar! Love the idea of the evening dress length – such a fascinating combination – a semi-structured halter neck with huge pockets as an evening maxi. Must be done, sometime soon….

Summer Dreaming halter dress - Modern Vintage Cupcakes

So saying though, I’m not 100% sold on the fit of this on me just yet. Not sure how much of that is the softness of the lawn with this style, how much is that the fit just isn’t right, and how much of it is that my body is still changing size and shape quite a lot post-pregnancies. The littliest guy is finally starting to sleep a bit better (only getting woken up about 3 times a night now – a massive improvement!!) so I’m feeling hugely better as far as sleep deprivation goes – fingers crossed I start feeling healthier soon too, and all those crazy changes settle down. Either way, I’ll see how I’m feeling about the fit of this in another couple of months. πŸ™‚

Big thanks to my lil’ sis’, who took these photos at the rugby field near her house. We saw ducks with ducklings (ducklings!! So cute!!!), the Little Guy ran around pretending to chase off robots (as one does when one is three), and one of the groundskeepers came over to ask what on earth we were doing and make jokes about being on New Zealand’s Next Top Model. Yep.

ducklings

Happy birthday Muse!

It’s crazy to think, but Muse patterns was lauched a year ago. (Well, just over a year ago, so it’s a bit of a belated birthday. πŸ˜‰

Its been a pretty amazing year – the highs and lows of the creative process, nervous anticipation before hitting ‘go’ on a pattern release (will anyone like it? What if there’s a huge mistake in it that I’ve somehow, despite the number of times I’ve gone over it, managed to miss??), and the amazing moments of seeing what others have made using the patterns. I’ve learnt heaps (so much tech and admin stuff to get your head around!!), had a huge amount of fun, and connected with lots of amazing people.

I wanted to do something a bit special for Muse’s first birthday. So, I made the first pattern that isn’t named after a particular Muse – Tahi! I’ve had the idea for this asymetric panelled skirt floating around in my head for a couple of years now, and it seemed the perfect time to get it out there into the world. It’s a bit 1940’s in style, or if you make it in a maxi length, it also has a definite 1970’s flavour to it and is heaps of fun for swishing around it.

But since it’s a first birthday pattern, I added a little something extra as well – a knit shrug, which comes with the Tahi skirt pattern! The shrug was interesting to draft – I spent a lot of time experimenting with the front, figuring out what curve angle and front width would work best with many different bust sizes, and would still cover strappy tops. I’m really happy with how it ended up – plus, being a shrug, it’s small enough to easily throw in your bag for an extra cover-up in case it gets cold. There’s going to be a large number of these in my wardrobe…. πŸ˜‰

Why ‘Tahi’? It’s the Maori word for ‘one’ – seemed somewhat appropriate for a first birthday pattern, no? And since it’s a first birthday release, and as per usual the full sale price (less bank fees) of the first weeks sales will be donated to charity, it seemed fitting that the Tahi sales go to the Neonatal Trust – a charity that supports prem and ill babies and their families.

And heck, because you guys are all awesome, and I’ve really appreciated the support and encouragement and feedback (seriously, so many of you have made my day at various times over the past year!!), there’s 50% off the Tahi pattern until 27 October, with the code ‘HELLOTAHI’.

Thanks so much for going on this crazy journey with me! I’m super excited about what the second year of Muse will bring (and have many many ideas in my head, waiting to be turned into reality). Wheeeee!!! πŸ™‚

(And for those who are wondering, yes, it’s been a while since I’ve posted. But I have been doing non-Muse sewing as well! I even have two completed makes all ready to show you, just as soon as I finish sorting out the photos. πŸ˜‰

Teapots, dresses and cake

September in Wellington can be a rather interesting month. Start of spring – lovely days, warmer weather, bitterly cold Southerly gales, heaps of rain. And often the entire lot in the space of a day.

Which makes it the perfect time to plan inside activities with friends, such as high tea. πŸ˜‰

High Tea at The Little Teapot | Modern Vintage Cupcakes

(And yes, it was rainy and windy outside. Perfect weather to get dressed up, eat small treats and drink pots of tea while chatting about sewing.)

High Tea at The Little Teapot | Modern Vintage Cupcakes

I’d bought a discount voucher off one of those daily deal sites for a cute little retro-themed cafe that specialises in high teas. (I admit it – I find it hard to resist deals for high tea. I really enjoy taking time out to sit and chat with friends over cups of tea, and turning it into an “occasion” such as high tea makes it a lot easier to commit to finding time for it.)

High Tea at The Little Teapot | Modern Vintage Cupcakes

It was a very lovely way to spend a couple of hours on a rainy Spring day. The food was (as always) delicious, the tea plentiful, and the company fantastic and inspiring. (Gotta love hanging out with other sewing people – I always come away with even more things I want to make!)

High Tea at The Little Teapot | Modern Vintage Cupcakes

And since I had my camera there (for garment photos afterwards), here’s a bunch of photos from the cafe….

High Tea at The Little Teapot | Modern Vintage Cupcakes

High Tea at The Little Teapot | Modern Vintage Cupcakes

High Tea at The Little Teapot | Modern Vintage Cupcakes

High Tea at The Little Teapot | Modern Vintage Cupcakes

High Tea at The Little Teapot | Modern Vintage Cupcakes

High Tea at The Little Teapot | Modern Vintage Cupcakes

High Tea at The Little Teapot | Modern Vintage Cupcakes

A British Affair

You know how sometimes, you’re just walking along, minding your own business, and all of a sudden a length of fabric simply jumps out of nowhere, wrapping itself around you and demanding to be taken home right that minute? (Even if you have no real idea of what you’re going to do with it after that?)

Yep, this was one of those.

I mean, how could I say no? It’s a vintage-inspired floral, all green and orange and white. And it’s a lovely quality cotton poplin – perfect for all sorts of dresses. (And we all know how much I love dresses by now, right?) Plus (and here’s the real cincher) – there are little Hello Kitty faces peeping out from behind the flowers!!!

Yes, that’s right – Hello Kitty!!!!!

Clearly, it had to be mine. (And it continued to inform me so in a rather loud voice.)

I tried briefly to resist, working to convince both the fabric and myself that, since I had no idea what I was going to do with it, it really had no place in my stash. But really, there was no hope in winning that argument. So, I got two metres, and decided I’d figure out the what-it-will-be details later.

(Why only two metres? Because this is a super-wide fabric! 160cm wide, in fact. Otherwise I would have gone for my more usual 2.5 – 3 metres. Plus I figured it may be a bit over-the-top with that floral to be a dress with sleeves.)

My original plan was to go with the vintage look of the fabric, and turn it into a button-up 1970’s sleeveless dress. Only would you believe it – I couldn’t find any button-up woven dress patterns from the 70’s in my stash!!! (There were, however, a large number of zip-front ones. Guess zips were a Big Thing for dresses back then…)

Then suddenly, it struck me – the Vintage Shirt Dress pattern from Sew Over It. Perfect!

(And it was perfect – I got it out of two metres of this fabric easily, even assuming the print had a direction (I went with way the largest Kitty faces were looking). The cotton poplin is a great quality and the weight worked well with the skirt volume and the shoulder gathers. Plus the rounded collar works well with the vintage vibe of the fabric, don’t you think?)

British Kitten dress | Modern Vintage Cupcakes

With fabric and pattern both from the UK, this had turned into a rather British vintage-inspired affair. πŸ˜‰

This was my first time using a Sew Over It pattern. I nabbed this one in PDF format when it was launched – I’ve been wanting to try one of their patterns for a while, and a button-up fit-and-flare style shirt dress will always find a home in my wardrobe.

British Kitten dress | Modern Vintage Cupcakes

Overall, I found this to be a great pattern. Reasonably simple, with some cute touches, like the rounded collar and the light gathers into the shoulder yokes. It’s the sort of pattern that lets the fabric be the star of the show, while still being fun and interesting to make.

British Kitten dress | Modern Vintage Cupcakes

I did have a couple of “what the heck?” moments when printing and assembling the PDF. There are two files with the pattern on them – Pattern 1 and Pattern 2. I assumed they related to the two variations of the pattern, so just printed the second file since I was making variation two of the dress. Nope – you need to print both, as it turns out. There wasn’t anything in the instructions about that, nor was there a diagram or table or the like saying what pages each pattern piece was on. Which was a shame, as I like to save paper and only print the pages I need, and in this case I had to print the whole thing, including the full sleeve piece. Ah well.

The other “what the heck?” moment I had came when looking at the actual PDF pages. Each of the pages has edges from the surrounding pages printed on it as well. Which isn’t a problem at all, by the way – I just found it a bit unexpected and had a moment of worrying if there was something wrong with my printer settings printing partial pages!

British Kitten dress | Modern Vintage Cupcakes

Now, the other thing you may want to watch out for is when you’re cutting out the bodice. There are dots that show where the gathering is. There are slightly different lines for the sleeveless vs. the sleeved version, and the gather marker dots are printed on the line for the sleeved version – if you’re making the sleeveless version, make sure you transfer these down down to the right point.

When cutting out the dress, I went for a size 10 bust, grading out to a size 12 waist and hip. (My measurements put me at a size 14 for waist/hip, but the finished measurements for that size had more ease than what I like, so I sized down.) I used the skirt length from size 20, and added a little bit to the length by turning up a 1.5cm hem, rather than the 4cm one called for. I also added 3cm to the length of the bodice, at front and back. (For reference, I added quite a lot less length to the skirt than I usually do for indie patterns, and quite a bit more length to the bodice.)

The dress came together nicely. There are released tucks for shaping at front and back waists, on both the skirt and the bodice. The armholes are finished with bias binding. And the front has a facing all the way along it.

British Kitten dress | Modern Vintage Cupcakes

(Going with what seems to be a current trend for me at the moment, I finished the seam allowances and edges with some yellow seam binding.)

British Kitten dress | Modern Vintage Cupcakes

The hem was done using a blind hem stitch on my sewing machine, and again some more yellow Hug Snug seam binding.

British Kitten dress | Modern Vintage Cupcakes

The instructions were fine and clear to follow. I couldn’t spot a key for the fabric/garment shading, but it’s easy enough to figure out, and I liked the cute touch of the right side of the fabric on the garment being patterned as though it was a vintage floral. πŸ™‚

One thing I did notice that was missing is that the collar pattern piece doesn’t have instructions on it to cut one in interfacing as well – so you’ll need to remember to do that.

British Kitten dress | Modern Vintage Cupcakes

I’m really happy with the final dress – I like the fit. It’s got a little bit of blousiness in the bodice back, as a result of the released tucks there, which is a bit different. The rounded collar makes me smile. πŸ™‚ And the ease at the waist is just how I like it, so going down a size based on the finished measurements worked out well for me.

(It’s also a bit more vibrant than it looks in these photos – tricky early-morning light with sneaky photos before I went to work. Hah! Spring is on it’s way!)

There we have it folks – one dress, with little Hello Kitty faces hidden in plain sight all over it! (How to get away with wearing Hello Kitty to the office? I wore this dress to work on Thursday and no one noticed the kitty faces. Hah! Stealth Kitty!!)

Summary

  • Pattern: Vintage Shirt Dress by Sew Over It
  • Fabric: Hello Kitty cotton poplin
  • Size made: 10 bust, grading to a 12 at waist/hips. (Body measurements put me at a size 14 waist/hips, but I went down one size at waist to have less ease, as per personal preferenace.)
  • Alterations made: lengthened front and back bodice by 3cm; cut out longest version of the skirt and only turned up a 1.5cm hem
  • Things to watch out for: if making the PDF pattern, print both pattern files; if making the sleeveless version, transfer markings for gathering down from where they’re located on the sleeved version; cut out one interfacing for the collar
  • Things I’d change next time: add another 0.5cm of length to front and back bodice; remove some of the fullness at the back bodice by lessening the width of the release tucks
  • Final verdict? Love it! Fits well, fun to make and wear, and will definitely make it again

British Kitten dress | Modern Vintage Cupcakes

Big Green Dots

Hey, how’s this for something a bit different? I made a top! And it’s not even for me – it’s for a lovely friend of mine.

Green Dots Bonnie | Modern Vintage Cupcakes

(Yep, that’s right. It’s not a dress. And it’s not for me. Surprise!!)

This is the Bonnie top from Bluegingerdoll.

(Which, admittedly, I have made for myself before.)

Bonnie top from Bluegingerdoll

This lovely friend of mine has quite a different style to me though, so I made a different view of the Bonnie top for her. Which was interesting, as it’s a view I’d never make for myself – always nice to have a bit of diversity in patterns like that, isn’t it?!

For this one, I used the hip-length variation (as in view C), with long sleeves and a scoop neck (as in view B). The sleeves are actually shorter than they should be though – I underestimated the amount of fabric I’d need for this and was a couple of centimeters short for the sleeves – eek! Luckily the new owner on the short side, so they ended up the length she likes. (Phew!)

Green Dots Bonnie | Modern Vintage Cupcakes

The Bonnie top is a nice and easy make. Self-fabric binding on the hem, some little gathers on the sleeve heads, and that’s about it, really! Aside from the gathering stitches on the sleeve heads, I put it all together on my overlocker, using the coverstitch function for the hem and sleeve hems.

The fabric is a poly blend knit, soft and spongy and cuddly, from The Fabric Warehouse. The colours are printed on it, so it’s actually white on the other side, which gives the black more of a flecked appearance. I must admit, I’m not as happy with this fabric as I would have expected to be for the price, though – it’s faded a bit and pilled a little already after only about ten washes. Still looks fine, and it’s the sort of thing only one of us sewing types (read: fabric-obsessed-people) would notice, but it does mean I won’t buy this fabric again. Which is a shame, as it’s awesome, coz it’s got big green dots on it!

Green Dots Bonnie | Modern Vintage Cupcakes

I spent a while lining up the dots to make sure they went straight down the centre front and the centre back, the sleeves, and that they were evenly placed on the neck binding. Through some happy accident, the dots on the neck binding ended up aligned with the ones on the front of the top, and the ones on the shoulders aligned with ones on the top of the sleeve head. Yippie for happy accidents!

Green Dots Bonnie | Modern Vintage Cupcakes

I’m happy to report that the girl I made it for loves it, and has worn it a lot already. It’s kinda funny, actually – we work together, and every time she’s worn it into the office she’s had compliments on it. Little warm fuzzies, yay!

60’s Chevron Coat

Way down here in Kiwi-land, things are cold. We’ve got snow on the hills, wind blowing up from Antartica, and the inevitable winter rains. Which makes it the perfect time to sew up a warm, snuggly coat!

60's Chevron Coat | Modern Vintage Cupcakes

I spotted this gorgeous chevron design coating fabric on the Minerva website a while back, and then spent a couple of months selecting and discarding patterns to use with it. Finally, I spotted this reproduction 1960’s coat pattern from Burda, Burda Style 7041 – perfect!

I really like the details of this pattern – it’s got princess seams from the armscye in front and back, and a classic tailored two-piece sleeve. The princess seams don’t quite go over the bust apex in the front, so there are small angled bust darts for added shaping. There are also two pockets in the front princess seams.

60's Chevron Coat | Modern Vintage Cupcakes

One thing I didn’t spend long debating on was which view to make up. A Peter Pan collar on a 1960’s coat? Say no more! And as for the fastenings – that set of two lots of four buttons is just too lovely.

60's Chevron Coat | Modern Vintage Cupcakes

This was my first time making up a Burda envelope packet. A very different experience to making up any of the Burda magazine patterns, that’s for sure! Overall, it was fine – not the most comprehensive instructions in the world, but it came together nicely. I did spend quite a while at the start hunting for the measurement chart though to figure out what size to cut – finally located it on the pattern tissue. Not my favourite place for those charts to be…!

60's Chevron Coat | Modern Vintage Cupcakes

I was a good little sewist and stitched up the bodice as a muslin beforehand. (Mainly because I knew I’d have to make a couple of adjustments, so wanted to check I got them right. Hah!) Sure enough, a few changes were made. I ended up lengthening the sleeves by 7cm, which then became more like 8cm after attaching the lining (I have super long arms, and I think this pattern has wrist-grazing sleeves rather than full length). The shoulders were widened by 1cm. And I moved the bust dart down by 6cm (which in hindsight was about 2cm too far, despite my careful marking on the muslin. Not sure what happened there.).

60's Chevron Coat | Modern Vintage Cupcakes

For most of the construction, I actually followed the instructions. Except for when it came to the lining – it called for hand-stitching the hem and sleeve hems, then hand-stitching the lining to them. I’m not a huge fan of hand sewing. So I just bagged the lining out instead – far easier and faster! (And yes, it meant I lost the little ease fold at the hem of the lining, but since I pre-washed both fabric and lining, I felt this was an ok loss to make.) As a result of bagging the lining rather than hand-catching it to the fabric, the hem and sleeve ended up about 1cm longer than they would have otherwise.

Overall, a pretty good pattern! I enjoyed making it, and would happily make it again. πŸ™‚

60's Chevron Coat | Modern Vintage Cupcakes

Now, let’s talk about some of the project details!

First up, the fabric. This is the most gorgeous, soft and snuggly coating I have ever worked with! It’s a wool/poly blend, and wonderfully thick and soft. When it arrived, I may have just stroked it for a while, haha! It washes up well too – I chucked it through my machine on a wool cycle, and it came out wonderfully. (Two small children = lots of sticky hands = I don’t want to have to dryclean everything, hence machine washing this beforehand!) Stitches sink into it, and it presses really well, too (and yes, this coat was given a good pressing, despite the front corner in a couple of photos! Not sure what happened there. Gah). It’s thick and cozy enough that I didn’t bother to sandwich a layer of flanellette between the coating and the lining, which I usually do when making coats or jackets. Yeah, I admit it – I’m in love with this fabric. Wearing this coat is like being wrapped up in a snuggly blanket. πŸ˜‰

60's Chevron Coat | Modern Vintage Cupcakes

The lining is just your classic anti-static lining. The coat is fully lined, and there’s an ease pleat right down the centre back.

60's Chevron Coat | Modern Vintage Cupcakes

The lining is used in the pockets too – lining on the top of the pocket bag, fashion fabric for the bottom layer. This way, bulk is reduced, and since the bottom layer of the pocket bag is the only one you really see, it still gives a nice continuous flow of fabric.

60's Chevron Coat | Modern Vintage Cupcakes

For the first time ever, I actually used shoulder pads, too. I normally don’t bother, since I have broad shoulders anyway and usually feel like they don’t really need any emphasis, but it felt like the right thing to do with this project. (Mainly because due to small children and lack of sleep, I’m slouching far more than usual these days – shoulder pads help with the illustion of being upright and therefore awake. πŸ˜‰

I added a coat hanger bar as well. To reinforce it and make sure it will bear the weight of the garment, I interfaced the back neck facing and also stitched two flat buttons directly behind the bar on the other side of the fabric – one button for each end of the hanger bar. They lie nice and flat, and now it’s all sewn together, you’d never know they were there. Good, hidden structural support!

60's Chevron Coat | Modern Vintage Cupcakes

While the coat calls for button holes, I couldn’t quite face the idea of making 8 small bound button holes, so instead cheated a bit and attached large snap fasteners. The buttons are simply sewn onto the right side of the garment. Sneaky, right?! πŸ˜‰

60's Chevron Coat | Modern Vintage Cupcakes

And to finish it all up, I added a couple of labels. My own label on a scrap of Cotton & Steel mustangs print cotton (because, mustard yellow! Horse!), and an Oscar Wilde quote on ribbon near the hem, just for the fun of it.

60's Chevron Coat | Modern Vintage Cupcakes

I’m considering this project a win – I’ve worn it every day since I made it. (Hence also why there are different outfits under it in the photos – one outfit from wearing it to work yesterday (thanks to my colleague Matt for taking pics!), and one from today when we went wandering along the waterfront. And here’s a couple of other shots from our waterfront roam today, just because. The view under part of the wharf, and the Chaffers Marina.

(If you want to see details of the other materials used in this coat, they’re all listed over here on the Minerva website.)

marina

under_wharf

Cozy Diamond PJ pants

For a couple of years there, I was making myself a new pair of pajama pants each year, sewing along with the annual Pajama Party that Karen ran.

But then it didn’t happen last year. Or this year, either. 😦

And so, no pajama pants got made. (Because let’s face it, dresses will always trump PJ pants when it comes to my sewing queue.)

Then two things coincided – Indie Pattern Month, and a sudden need for at least one more pair of PJ pants (yeah, sometimes they just die on you. Very sad. 😦

Cue the Carolyn pajama pants, from Closet Case Patterns. Paired with a flanellette that had been “maturing” in my stash for, um, a few years…. (*avoids eye contact*)

Cozy Diamond PJ pants | Modern Vintage Cupcakes

This was my first time making a Closet Case Patterns pattern, and I must say, it was a rather pleasant experience. Everything came together nicely, instructions were clear, and Heather has thoughtfully separated this pattern into different files for the top, pajama pants, and shorts, so it’s super easy to just print off which one/s you want.

Cozy Diamond PJ pants | Modern Vintage Cupcakes

The only thing that I found a little odd was when it came time to add the elastic to the waist. The instructions say to thread it through the casing then cut to fit. Personally, I just like to know the length to cut beforehand, based on my waist measurements – there’s a bit less mucking around that way, and you know you’ve cut it the right length so less risk of accidently ending up with it too loose or too tight.

Cozy Diamond PJ pants | Modern Vintage Cupcakes

I’m not really big on pajama tops (singlet tops all the way!), so just made the trousers, in a size 12. And yeah, I’m happy with them! The fit is good – a bit slimmer than I’m used to, but still comfortable. The pockets sit nice and flat. The rise is pretty good, although a bit lower than I would personally like – they sit a couple of inchs below the waist on me. (With small people regularly grabbing my legs, waist height is at far less risk of being tugged down. Hah!) (Nothing wrong with the pattern there, by the way – just personal preference for fit so noting it to make sure I don’t forget for next time. πŸ˜‰

Here’s how the pockets sit, in case you’re curious:

Cozy Diamond PJ pants | Modern Vintage Cupcakes

Cozy Diamond PJ pants | Modern Vintage Cupcakes

Due to being tall and all, I added 4cm to the length of the trousers, which worked well. I’d add another 1.5cm on top of that next time, as they’re still fractionally too short.

I also narrowed the waistband, as I was using narrower elastic.

Another change I’d make next time is to leave off the pockets – they’re great, but I don’t see myself ever using them, so it’s not quite worth the effort to sew ’em…. Although they are kinda cute, so maybe…?

I’ll be keeping the mock fly front though – there’s something about that detail I really like. πŸ™‚

I added some piping in grey down the sides of the legs. Yay for piping!

Cozy Diamond PJ pants | Modern Vintage Cupcakes

And there isn’t really much more to say about these! They’re comfy, cozy, great for winter (brrrr winter!), and I’ve already bought some fabric to make another pair. (With foxes on! Yeah!!)

Cozy Diamond PJ pants | Modern Vintage Cupcakes

Shards of Hope dress

Sometimes it seems like all the stars align and a project suddenly happens that ticks several boxes at once.

My good sewing buddy Mel and I were thinking – it’s about time we did another twinsies creation, where we both make the same pattern at the same time. Plus, it’s the second birthday for The Monthly Stitch in August, with the theme being “two is the magic number” – a perfect time for twinsies!

And then we got to thinking, how else can we incorporate that theme….?

Discussions were had around fabric, and we realised we both had fabric from the What A Gem range by Camelot in our stashes. Mel has the “gems” design, and I’ve got the “arrows” one. Two designs from the same range – seemed perfect!

Shards of Hope dress | Modern Vintage Cupcakes

So then we just had to come up with a pattern that worked for each, and for the amounts of fabric we had….

And that’s where this pattern comes in. It’s the Hawthorn dress by Colette Patterns. It was given to me as part of the pattern swap for Indie Pattern Month over on The Monthly Stitch. I was pretty darn excited to get it in the mail, as it’s a pattern I’ve been debating about buying for quite some time! (Great choice, swap partner! πŸ™‚ There’s an Indie Pattern Month wrap-up day today over on The Monthly Stitch, and I really wanted to make up at least one of my two swap patterns in time for it! (The other one is currently on my cutting table. Soon it shall be made. Soon….!)

Colette Patterns Hawthorn dress

Plus, with the cute collar, there was the option of using two different fabrics on our dresses (again, using the “two is the magic number” theme). So yep, all boxes were ticked – twinsies in the pattern, twinsies in the fabric range, an indie pattern, and in my case also a pattern swap pattern. Win!

Shards of Hope dress | Modern Vintage Cupcakes

One other box, too – this is also my Minerva Crafts Bloggers Network make for the month. Yippie!

Shards of Hope dress | Modern Vintage Cupcakes

Crazily enough, despite owning a couple of Colette patterns, this is the first one I’ve ever made (excluding their two free ones, neither of which worked well for me). I approached it with some trepediation – I’ve heard quite a bit about how hard this pattern is to fit, and Colette also drafts for a C cup while I’m an AA (yes, seriously).

Shards of Hope dress | Modern Vintage Cupcakes

With that in mind, I took the time to do a proper small bust adjustment (SBA) on the pattern, reducing it by a total of 2″ in the bust.

The only other change I made to the pattern was on the skirt. I originally got this fabric to make a 1950’s blouse out of, so only had 2 1/4 yards – officially no where near enough to make the Hawthorn! Add in the directionality of the print, and it was a bit of a cutting challenge. To make it fit, I cut the back skirt on the fold, and folded out 13cm at the hem of both front and back skirt pieces (making for a total of 52cm removed from the hem circumference in total!). And it fit! (Just!)

I had a lot of fun playing with the print direction for this one. I started with the bodice placement, deciding that vertical arrows would work best there, especially with the waist dart.

Shards of Hope dress | Modern Vintage Cupcakes

The skirt was origianally going to be on angles, with the arrows forming v’s at each centre and side seam. But there just wasn’t enough fabric for that, so it got cut out with horizontal arrows that dipped into v’s at the side seams.

Shards of Hope dress | Modern Vintage Cupcakes

The collar was a bit more fun, with arrows going around the neckline.

Shards of Hope dress | Modern Vintage Cupcakes

Shards of Hope dress | Modern Vintage Cupcakes

I didn’t have quite enough fabric for the facings, so the bodice facing is scraps from my Dolly Turtles dress. (Which I forgot to get a photo of, whoops!)

Speaking of the facings, they’re finished with hug snug seam binding – I may have given into temptation and gotten some in a lovely bottle green shade. Love this stuff so much!!

Shards of Hope dress | Modern Vintage Cupcakes

Hug snug was also used for the hem, which was then stitched up with a machine blind hem.

Shards of Hope dress | Modern Vintage Cupcakes

The armholes are finished with green bias binding.

Shards of Hope dress | Modern Vintage Cupcakes

Also, can I get a yay for these buttons? Aren’t they fabulous?!? I’m so happy to have found them on the Minerva site! They’re such a lovely shade, and match the coral coloured triangles in the fabric so nicely. Plus, the lines on half of them reflect the lines of the arrows. Yippie!

Shards of Hope dress | Modern Vintage Cupcakes

(Again though, as I originally got the supplies for this for a blouse, I didn’t have enough buttons for the whole dress. I spaced them out a bit further than the pattern called for, and used four snap fasteners for the lower section of the skirt instead. I may yet go and just stitch that part of the skirt down – depends on how well the snap fasteners hold up to a day of getting up and down from an office chair….)

Shards of Hope dress | Modern Vintage Cupcakes

I’m actually pretty happy with the fit of this. It’s a bit looser in the bodice than I normally like, and I’m still debating a bit whether to take it in or not as it’s only fractionally too loose…. Hmmm…. (What do you think? Take it in, or leave it as it is?)

Shards of Hope dress | Modern Vintage Cupcakes

One thing I found surprising – the front waist seam is a bit too low on me, about 1.5cm too low, even with the small bust adjustment raising it up a bit. Since I’m so tall, I’m used to waist seams being a bit too high, so this was quite a surprise! Probably something to watch out for if you make the pattern up, and an adjustment I’ll make in the future.

Shards of Hope dress | Modern Vintage Cupcakes

I did mix up the construction order a bit, sewing the skirt pieces to the bodice pieces, and the side seams got stitched up last. This is pretty standard for me – it makes it a lot easier to make adjustments with changing post-baby body shape. πŸ™‚

If you’re curious, here it is with out a belt. (Although I’ll probably always be wearing it with a belt, just coz that’s how I roll.)

Shards of Hope dress | Modern Vintage Cupcakes

Shards of Hope dress | Modern Vintage Cupcakes

Oh, and why the name? Well, it’s actually named after a book I’m reading at the moment. Some of the lead characters are part of a group called the Arrows – rather appropriate when using this fabric, no? So yeah, the dress adopted the name from the book. (It’s one of those books I expect I’ll read several more times in my life, so that’s always a good thing. Maybe I should name more garments after books. I do like books. And sewing. Hmmm….)

Thanks to the lovely Nicola, who played photographer on a freezing cold winters day! We went exploring, and found a muddy stream bed with a fallen log for photos. Here’s some scenery, just for fun….

leaves

log

tree_fork

yellow_flowers

moss

Snuggly squishy cuddly and warm

Oh my gosh, I knitted a jumper!

Cropped jumper in grey and teal | Modern Vintage Cupcakes

And it’s got really long sleeves.

Cropped jumper in grey and teal | Modern Vintage Cupcakes

With cute scallop colourwork where the rib joins onto the main sleeve.

Cropped jumper in grey and teal | Modern Vintage Cupcakes

Oh, and there’s scallop colourwork where the rib joins the body, too.

Cropped jumper in grey and teal | Modern Vintage Cupcakes

Yay!!! πŸ™‚

This here jumper – it was actually the second “proper” (i.e. not a plain scarf or peggy square) project I started. I cast it on as soon as I finished my grey Miette cardi, waaaaaaay back at the end of 2013/start of 2014.

(Yeah, that’s right. A good year and a half ago.)

I was making good progress on it, and then I found out I was pregnant.

And you know what? Cropped, fitted jumpers don’t fit so well over a baby bump.

So it got put on hold, and I made a few cardigans instead. Far more practical for pregnancy and nursing, after all!

But then a couple of months ago, winter came along. It was cold (and I am not a fan of the cold). So I picked this jumper up again.

Having to go to Masterton and back on the train for work a couple of times gave me a couple of good, solid knitting sessions. So progress was made! (Finally!)

And now, it’s all done! Yay!

Cropped jumper in grey and teal | Modern Vintage Cupcakes

And it’s super warm and soft and snuggly. With lovely long sleeves that keep my wrists warm. Win!

The pattern is “A Cropped Sweater for Winter” by Andi Satterlund. (It’s a free pattern, by the way. Go get it!) It’s a nice and simple pattern, knit in the round as hers tend to be. It’s got a semi-square neckline, and cute scallop colourwork details with contrast bands. Very easy to knit, and in 10 ply yarn so pretty quick too. (Even if that “pretty quick” knit took me a good year and a half!)

Cropped jumper in grey and teal | Modern Vintage Cupcakes

As is more-or-less inevitable (since I just can’t leave well enough along and have to mess with things every time), I made a couple of changes. Nothing major, though – just length alterations for the sleeves. The sweater is meant to have 3/4 length sleeves but, well, I live in Wellington. It gets cold here. Long sleeves are far more snuggly in winter.

(Plus, I’m tall. RTW things with long sleeves end up as 3/4 length sleeves on me. At times, I overcompensate for this when making things. Extra length! Yeah!!)

So I added 60 rows of knit to the end of the sleeve, before I started the cuff. And then I added an extra 10 rows of rib, too. (And with that extra 70 rows in total, they’re actually only just long enough. Hmmmm.)

Cropped jumper in grey and teal | Modern Vintage Cupcakes

The yarn is Cleckheaton Country Aran 10ply, purchased from Spotlight (horror of horrors! But yes, I actually found some lovely, gorgeous, pure wool yarn amongst their cheap acrylics!!). The body of the jumper is in colourway 4013 (Dark grey) and the contrast is colourway 4009 (Teal).

(I learnt a lot about how to read labels on balls of yarn while buying this, from a lovely lady who was also browing the yarn selection. She knew lots about knitting, which was awesome as I knew pretty much nothing at that point in time, and she was very happy to share her knowledge! She taught me how to check dye lots as well, to make sure I didn’t run the risk of any colour variations. Thanks, wonderful stranger at Spotlight! Aren’t fellow crafty people awesome?!?)

Cropped jumper in grey and teal | Modern Vintage Cupcakes

Changes I’d make next time would be adding yet another 5 rows to the sleeves (so a total of 75 extra rows, instead of the 70 I did here), and adding an inch and a half to the body as it’s just a smidgeon too short. (And next time, I’ll learn to do the super stretchy bind-off, as it’s a little tight getting it on and off over my shoulders – whoops!)

Anyways, I’m really happy with this jumper. Sure, it’s not perfect, but it’s snuggly and goes well with things in my wardrobe, and it’ll keep me warm.

Yay, knitting! πŸ˜€

Cropped jumper in grey and teal | Modern Vintage Cupcakes

My lovely sister snapped some photos up at Truby King Gardens, where we went to get pics of the final two samples of the Sophie cardi. Gotta love that winter sunlight through pine trees….

small_flowers

leaves

forest_path