Category Archives: Indie patterns

Roses in the City

Look, look! I made a thing!!!

To be more specific – I made a dress!!! A summer dress, in the hope that one day summer will arrive. (Although it looks like I’m going to have to travel to the Northern Hemisphere to get any summer this year… Hmmm…)

Rose Squared dress | Modern Vintage Cupcakes

And if we’re wanting to be really specific, I made the Rose City halter dress by Sew House Seven, using a Liberty poplin in the classic Carmine print from Minerva Crafts. Because rose pattern on rose dress pattern just screams out summer picnics and adventures, don’tcha think?

Rose Squared dress | Modern Vintage Cupcakes

(Plus I figured the extra sweet girlishness of roses would be offset by my tattoo with the halterneck back. Coz normally, this print would be just a little bit too sweet for my taste…)

Rose Squared dress | Modern Vintage Cupcakes

This was my first time sewing a Sew House Seven pattern, although I’ve got a few of them in my ‘things to make’ list. (Have you see the Tea House dress? Gorgeous! I need a maxi in that style…) I found it to be a great pattern to work with – instuctions and markings all nice and clear, all the measurements that you need to figure out what you’re doing, everything matched up as it should. Overall, a well crafted pattern, I reckon! 🙂

Rose Squared dress | Modern Vintage Cupcakes

I made up version B, with the bias-cut A-line skirt with curved patch pockets. I did all my usual adjustments – grading out a size between bust and waist, lengthening the bodice by about 1.5cm, and doing a small bust adjustment. For once, I didn’t length the skirt, as it seemed to be a good length (i.e. I can actually wear it without fears for showing the world my unders. What the heck is up with super short dresses?!?!? Or maybe it’s just those of us who live in windy locales who worry about that… 😉

Rose Squared dress | Modern Vintage Cupcakes

The Rose City Halter dress has some lovely details, including a fully-lined bodice, unusual pocket shaping (curved on one side and the base, and straight on the other side!), released pleats at the shoulders, and separate neck ties that you line with the same fabric as your garment so they’re always showing right-side-out. The lined bodice gives a great, clean finish – I went with a yellow lightweight poplin for lining, just to add to the summery essence of the whole garment. 😉

I added a couple of other touches too, naturally. I hemmed the skirt using a blind hem and Hug Snug rayon seam binding. And I added an Oscar Wilde quote as a label on the inside, on top of an accent of the Carmine poplin.

Rose Squared dress | Modern Vintage Cupcakes

Rose Squared dress | Modern Vintage Cupcakes

I’m really happy with how this one turned out. So lovely and girly and summery to wear, and fun to make. 🙂

Also – notice the shoes? Liberty print Nikes, yeah! Double Liberty!! 😉

(Photos taken on a trip to Wellington Zoo. In late January (yes, that long ago). In between chasing after two preschoolers who were determined to cause chaos. Hah!)

Rose Squared dress | Modern Vintage Cupcakes

Swaying around the world

Hello hello! Long time, no see! (Again. Whoops!)

You know what? I think this is officially the longest I’ve ever been without posting here in the past few years. Yep. So there’s a fair bit to catch up on…! 😉

But first up – let’s talk sewing.

Yellow Sway dress | Modern Vintage Cupcakes

And a bit of travelling.

So anyway, I made another dress! (Surprise!)

Yellow Sway dress | Modern Vintage Cupcakes

This time it’s the Sway dress by Papercut Patterns.

Papercut Patterns - Sway dress

Papercut Patterns – Sway dress

Now I liked this dress from the moment I saw it when it was released. But at the same time, it’s not my usual style. (I am a ‘fit and flare’ kinda girl, after all. Hah.) I originally got it because I was still nursing my youngest one, and thought that the tent style and centre front seam would work really well (easy to wear with post-pregnancy body changes, plus easy to add a centre front invisible zip for ‘easy access’ when required by a little one).

But then of course, I didn’t get around to making it before the littlest one decided to stop nursing. And it seemed like it would be yet another sewing plan consigned to the ‘things that could have been made’ pile. 😦

Clearly though, the pattern escaped that fate! Thanks to getting my hands on some lovely drapey viscose with a big floral print. I fell for the fabric, then had to figure out what to make with it. Something with drape… Something that didn’t require too much fabric so I could fit it on what I had… Something that didn’t have too much detailing because of the size of the floral print…. Eureka! The Sway dress!

Yellow Sway dress | Modern Vintage Cupcakes

Plus, it seemed a perfect style for travelling. 😉

(And it was. This dress got it’s first wear in Hong Kong. And then on a long distance flight to Zurich, a shorter flight to Heathrow, a trip to Goldhawk Road in London (!!), a day in Singapore, a flight from Budapest to Frankfurt and on to Singapore, and also a day wandering around Cegled in Hungary. Which is where these photos were taken, courtesy of my extremely wonderful friend Agi. 🙂

Agi and I have a long history. We met when we were 18 – I lived with her family for a year as an exchange student, and they became my “second family”. I try to go back to Hungary every few years to visit them – and since I really wanted to introduce my youngest child to them before he got very old, this year the trip was made! (But more about that in another post.)

Anyway, one of the days I was staying with Agi, we went to Cegled, the nearby town, for a wander around. Perfect excuse for blog photos, no? 😉 These were mainly taken in the park at the town centre.

But let’s talk about the dress for now, shall we?

The Sway dress is a lovely pattern. Simple but with a great cut – very 70’s in style with it’s A-line tent dress style. There’s a centre front seam and a centre back seam, and inseam pockets. It comes in two lengths – short (the length I made) and shorter (the length I shall never make). (And yes, I know it’s meant to be longer than this but hey, I’m tall. This is how short above-knee-length styles end up on me.)

The neckline is a deep, wide vee on one side, and a scoop on the other – you can wear the dress either way ’round, so you can pick and choose which neckline you want at the front on any given day.

Yellow Sway dress | Modern Vintage Cupcakes

There are no fastenings – it’s a pull-on style, with a narrow tie belt that you can wear to cinch it in at the waist. (Top tip – this also makes it super comfy for wearing for long distance flights! I suspect this is going to be a go-to travel pattern for me.)

Yellow Sway dress | Modern Vintage Cupcakes

So far, sounds pretty simple, right? Well, then we get to the facings and that all changes! The necklines (both of them) are faced, as is the armholes. The facing is an all-in-one style, and the pattern gets you to use the ‘burrito’ method to attach it. (I.e. roll it up really tightly to stitch one side, then roll tightly the other way to stitch the other side.) The result being a lovely, clean finish around both necklines and armholes. Beautiful!

And because I could, I finished off all the inside edges with Hug Snug seam binding. (Although I must admit wishing I hadn’t gone for such a contrast colour, as it shows through the yellow a bit around the edge of the facing. Whoops!)

Yellow Sway dress | Modern Vintage Cupcakes

As for changes I’d make next time? Only a couple of things, really. I prefer the vee neckline at the front, but it stretched out pretty quick (or else it was always pretty low) on this dress, so next time I’d stabilise it before stitching it, and possibly raise it up a little bit. (Main issue – when I lean forward you can see right down the dress. Oops!) I’d also topstitch the facing down around both necklines – the pattern calls for understitching, but with the width of the neckline and this pattern working best in a drapy fabric, I found it wasn’t quite enough to stop the facing from rolling to the outside. Oh, and the other change I’d make? Add some length. Hah!

Despite this not being my usual style, I’ve been pleasantly surprised by how much I love wearing this dress! It’s perfect for warm weather, and for travelling. (Plus, it makes a great hiding spot for toddlers.)

Yellow Sway dress | Modern Vintage Cupcakes

And now, let’s finish off with some scenic shots. Just because we can. It was a beautiful sunny autumn day when we were out taking photos – warm in the sun, a little cooler in the shade, and the leaves not quite starting to change colour. (Back in mid-September, by the way. Like I said – I’ve got a bit to catch up on!)

statue

Yellow Sway dress | Modern Vintage Cupcakes

windows

Yellow Sway dress | Modern Vintage Cupcakes

The youngest child loved it there in the small park – he spent lots of time running off (necessitating us running after him as he ducked around hedges and snuck under trees and deliberately put small stones in his mouth while laughing at us).

foxinpark

stonesflowers

Yellow Sway dress | Modern Vintage Cupcakes

Typically, he also found one hole in the lawn and stood in it for a while. Because – child.

Yellow Sway dress | Modern Vintage Cupcakes

After the park we went wandering a little bit to find a gift store, and a supermarket so I could buy some Hungarian chocolate to take home and some amazing cake for us all to eat after dinner. (Yum!) Youngest one being a child, he decided part-way down a side street that he didn’t want to be carried. Nor did he want to walk. Stand-off ensued. *sigh*

Yellow Sway dress | Modern Vintage Cupcakes

sidestreet

Agi pointed out this building tucked behind some of the others – it was the old fire station tower. Made of wood, and tall so they could keep watch for fires.

firetower

Rounded off the trip into town with a lavender lemonade gelato. Which was as amazing as it sounds. Yum!! Wish we had that type of ice cream here…. ❤

Yellow Sway dress | Modern Vintage Cupcakes

Nighttime florals

Hola! Once again, long time, no blog post! (Whoops!)

Not to say that I haven’t been writing blog posts – it’s been Indie Pattern Month over on The Monthly Stitch, which has been rather full-on! Heaps of fun though, and so many inspiring creations. (And I may have added a few more things to my things-I-really-want-to-sew-right-this-minute list. Yikes! Too much I want to make, never enough time… If only one could get paid to sit at home and sew pretty things for oneself… 😉

Anyways, I have been doing a bit of sewing, if not as much as usual! I’ve also been doing some knitting, since it’s winter over here and winter = knitting, yes indeed. (I even have a completed knitting project to show off – oh my! But that’ll be for another day, as this cardigan got finished first and therefore is getting posted first.)

So for today, I have for you… a cardigan! A lovely black lightweight merino knit cardigan, to be precise.

NIghttime Florals cardigan | Modern Vintage Cupcakes

A while back, my friend Lou wore a gorgeous cardigan to work that I immediately coveted. It had a lovely curved front yoke panel in a sheer poly chiffon type fabric, while the rest of the cardigan was knit. Gorgeous, I tells ya! So naturally, I immediately added making one similar to my ‘things to do’ list. 😉

NIghttime Florals cardigan | Modern Vintage Cupcakes

Black isn’t really my thing, but it’s also a very useful colour to have as a cardigan, as it actually goes with other things. (Unlike many of my garments, which pile together in a colourful, clashing mash-up of crazy prints.) So I pulled this lovely super-fine merino out of my stash, paired it with a black-with-green-floral print cotton I got from Fabric-a-brac a while back, and set to work.

I used the Jenna cardigan pattern as a base. Making the modification was easy – I figured out where on my chest I wanted the curve to end, and used the notch markers in the armscye to start the curve from the side. Simply cut it directly from the pattern, then added seam allowance to both yoke and remaining front bodice when cutting out the pattern. Simple! (Although I did take care that the woven fabric was mainly above my bust, for easy fitting. Not that I have much of a bust, but still…)

NIghttime Florals cardigan | Modern Vintage Cupcakes

The sleeves on this are actually narrower than the original Jenna cardigan sleeves – I’ve been playing around a bit with them, and may have an update to the pattern coming out in about a month, with a narrow sleeve option as well as the original classic straight sleeve. Sssh! Secret squirrel! 😉

Photos were taken around on the Miramar Peninsula, while hanging out with the lovely Nikki and Sandra. (Thanks, ladies!) We went to see a great movie together (whose name I just completely forgot, but it was about “the worst singer in the world” and was utterly delightful), then nabbed some photos on the coast on the way back home.

Right then, back to the knitting I go! 😉

What are you making at the moment? Go on, give me some inspiration on what to start next!


NIghttime Florals cardigan | Modern Vintage Cupcakes

rocks

NIghttime Florals cardigan | Modern Vintage Cupcakes

harbourView


True blue, baby

It’s getting cold, down here in the Southern Hemisphere. We’ve been having a lovely autumn so far – warm days, good weather. And then a couple of days ago, winter decided to arrive. Brrrr!!! Oh well, I guess it had to happen sooner or later?!

And winter is, of course, the perfect time for flannel pajamas. 😉

Which brings me to… the first thing I’ve made for myself in nearly two months! Eeek!!!! How on earth has it been that long?!?!

True Blue pajama pants | Modern Vintage Cupcakes

Anyway, I’ve been meaning to make some new pajama pants for, well, ages really. Most of mine are nearly threadbare and overdue for retirement. And you know, colder weather, need new pajamas and all that.

Enter the Carolyn pajama pants, from Closet Case Patterns. This is the second time I’ve made these, and I wear my first pair all the time. They’re super comfy – a nice slim cut, while still plenty roomy enough to move around in easily. I now officiallly have a go-to pattern for pajama pants. Hah!

This is where I have to give a big shout-out to me-of-the-past, who wrote a blog post last time I made these and said I lengthened the pattern by 4cm and should add another 1.5cm in the future. Yay for blog posts and relevant details like that! So I followed me-of-the-past’s advice, and added 5.5cm length to these, and now they are perfect. Love it!

True Blue pajama pants | Modern Vintage Cupcakes

For this pair, I made the variation with the cuffs at the bottom. (The 5.5cm of extra length was added to the legs – the cuffs are the same width as the original pattern.) And because I could, I added some teal green piping where the cuffs joined on to the leg.

True Blue pajama pants | Modern Vintage Cupcakes

(Why teal green? Ok, I admit it. It was the closest to my sewing table and I couldn’t be bothered standing up to find another colour. Lazy!! But also happy, as I think it works really well with this blue. 😉

The fabric is a nice flannellette from Minerva Crafts. Lovely and soft and cozy to wear, it sews up like a dream as flannel tends to do. And I am completely in love with the shade – such a vibrant royal blue!

The elastic in the waistband is also from Minerva – a classic no-roll elastic, slightly narrower than the pattern called for (whoops!) but I think it works fine anyway.

Aside from the length addition, I didn’t make any changes to this pattern at all. And I recommend it – it goes together well, I love the fit, and the instructions are all nice and clear.

And yes, I’ll be making some more soon. I have some flannellette with foxes all over it that is demanding to be winter pajamas… 😉

True Blue pajama pants | Modern Vintage Cupcakes

(I must say, it’s nice to have made something for myself again…. Here’s hoping it won’t be so long before the next garment!)

A Measure of Pink

Ever since I saw the Meta dress that Dolly Clackett made, I’ve been wanting a tape measure dress all of my own. And now… I have one! Yay!

Measure of Pink dress | Modern Vintage Cupcakes

I was pretty excited to find this cotton poplin at Minerva. Although I must admit to debating about it for a while – would it be too much? Is it too cliched for a sewist? Am I going over the top?

(The answer to all of those is, of course – not at all!)

But I kept on returning to it, and eventually I caved. (Which then prompted a bunch more thought – which colourway? I was super tempted by the red and grey for a while. But pink won out. Just!)

Measure of Pink dress | Modern Vintage Cupcakes

With such a directional print, I wanted to match it with a pattern that would play with that. Enter the By Hand London Sophia dress. With its Y darts in the bodice, angled arm holes, and full skirt with godets, I figured there was ample angle opportunities to play with a inconsistent bold stripe design.

Measure of Pink dress | Modern Vintage Cupcakes

This was my first time sewing up a By Hand London pattern. I used the paper pattern (although they’re sold out of the paper version, you can still get one from Minerva crafts). I really do like the packaging design of By Hand London patterns. The pastel colours, different shaped cut outs, and the well thought out details, such as the design on the inside of each sleeve that matches the inspiration of the pattern. Lovely!

The instructions are in a nice booklet – clear illustrations, easy to follow steps, and a friendly tone of voice. My one issue was that the size chart and finished measurements are on the back of the packaging inset, rather than in the instruction book – it took me a minute to find them, and I had to keep reminding myself they were there, rather than where I expected them to be. But really, that’s pretty minor, and all the measurements you need are still there to be easily accessed!

The pattern came together nice and easily. All the notches lined up, all the markings that were needed were there, no problems whatsoever.

Measure of Pink dress | Modern Vintage Cupcakes

I made my usual adjustments to the pattern – doing a 2” SBA to bring it from a B-cup to an AA-cup. Lowering the front bust dart points by quite a bit. And lengthening the bodice by 1.5”. All changes I need to make to pretty much every pattern, and nothing out of the ordinary at all.

There was a bit of debate when it came to choosing a size. I based my decision on my high bust measurement + 2″ (as the By Hand London patterns are drafted for a B cup, and I’m a AA cup). My measurements fit between two sizes, and I went down rather than up. A deliberate decision – I am still holding out hope that I’ll lose the last of the baby weight, in which case, the smaller size should fit well (hopefully soon?!?). Whereas a lot of the dresses I made last year are now a size too big in the bodice. So, I sized down, and the result is admittedly a bit too fitted in the bodice. I’m still debating about that – should I let the upper bodice side seams out a bit? Or leave them there? Hmmm…. (I’ve left the lining unattached at the waist for now, while I decide. Because I am lazy and once I’ve finished a garment, especially one that involves hand stitching down lining on the inside, I’m very unlikely to go back and alter it later. Sad but true.) Fit for now, or fit for later? What do you think I should do??

Measure of Pink dress | Modern Vintage Cupcakes

The bodice is fully lined, for which I used an olive green cotton remnant that was near the top of my stash (why? Because I couldn’t find the lemon yellow poplin I would have usually used, and this was the only suitable weight non-patterned fabric nearby!). The lining gives it a nice clean finish around the arms and neckline. I also stitched the lining to the invisible zip on the inside for a clean finish, rather than handstitching it as the instructions called for.

A Measure of Pink dress | Modern Vintage Cupcakes

Oh, and added a label for fun, of course. 😉

(Speaking of which, I really must get around to getting some good woven labels made. It’s been on my to-do list for a while now….)

For hemming, I used yellow Hug Snug, and a blind hem stitch on my machine. And this is where the volume of that skirt really comes in! It took me 9 minutes of steady and fast sewing to get around the hem of the skirt. Then pressing time, then another 9 minutes to do the blind hem stitching. Yep, that hem took over half an hour to do – yikes!!! Not one I would ever recommend hand stitching, that’s for sure!

A Measure of Pink dress | Modern Vintage Cupcakes

As far as the style goes now that I’ve made it up – I like it! The Y darts in the bodice are a fun touch, especially how they’re replicated on the back, and I like how they echo the neckline and armhole angles. The skirt is lovely and full and swishy and fun to wear with it’s seven godets, yet still nicely fitted around the waist and upper hips as they start a little down from the waistline. Plus, good for twirling!

Measure of Pink dress | Modern Vintage Cupcakes

I must admit that the fit isn’t quite right on me though – I didn’t pick it up in my super quick muslin (which was done mainly to mark where to move the bust point to and to check bodice length), but the armholes aren’t sitting quite right on me in front and back at the lower edges – there’s a bit of standing-out-from-the-body happening there, so I’ll need to fix that for the next variation. (And yes, there is likely to be a next variation. With the collared version – I really want to make that one, but it seemed like it might be a bit much with all the tape measures and the direction changes in the fabric for this time!)

Measure of Pink dress | Modern Vintage Cupcakes

Overall – I recommend this pattern, and will happily make it again. I also recommend this fabric – a nice and easy to sew with poplin, with a fun print and great colours.

It also works well when worn with a cardigan, so for me that makes it pretty much an all-year-round dress when matched with tights, boots, and a long-sleeved merino top underneath.

Measure of Pink dress | Modern Vintage Cupcakes

I wore this out on Friday night as it was my last day at work so we went out for a farewell dinner and drinks, and got compliments from two complete strangers, so I figure it’s a win. 😉

Measure of Pink dress | Modern Vintage Cupcakes

The photos were taken last weekend, when my parents were visiting and we all went to the Southwards Car Museum up the Kapiti Coast (for which a blog post may follow sometime soon). We had lunch at Paekakariki then took the kids to a nearby playground so they could burn off some energy. Big thanks to my lil’ sis’ for playing photographer at the park! The island behind me in the hilltop images is Kapiti Island – a nature reserve where there are all sorts of amazing NZ birds. And I haven’t been there yet, as you have to book in advance and my life is not that organised these days – maybe in a few years when the kids are bigger. Since we were at a playground, fun had to be had – climbing trees, going down slides, that kind of thing. Because – playground!

Measure of Pink dress | Modern Vintage Cupcakes

Measure of Pink dress | Modern Vintage Cupcakes

Summer is for strawberry milkshakes

I love summer – warm weather (sometimes!), sunshine, flowers blooming, long days and relaxed evenings. It all makes me happy. 🙂

Know what else makes me happy? Dresses! In particular, summer dresses. Yes indeed!

And so, it seems only appropriate that my first make on the blog this year is… a summer dress. (Surprise!)

This months theme over on The Monthly Stitch is ‘Cheers for New Years’ – choose your favourite beverage as inspiration for something to sew. While pondering which drink to use for inspiration, my eye was caught by this multi-pink-toned quilting cotton from Minerva. The colours and squiggly design immediately made me think – strawberry milkshake! (Which is, after all, a rather fantastic drink for summertime.)

Strawberry Milkshake dress | Modern Vintage Cupcakes

Inspiration and fabric decision made, the next choice was… which pattern to use? (Obviously, it would have to be a dress. Because, dresses.) With the directional print of the fabric, I thought it would be fun to make something that could use that as a feature – the Sylvie dress by Christine Haynes. It’s a fun summer dress, and features a wide band under the bust – perfect for mixing up a print direction for contrast.

Sylvie dress by Christine Haynes

Size-wise, I made a size 6 at the bust, grading out to a size 10 at the waist and hip. Officially, my high bust measurement put me at a size 8 in the bust, but going by the finished garment measurements I felt that would be too much ease for my personal preferences.

Strawberry Milkshake dress | Modern Vintage Cupcakes

(And here’s where I made a dumb mistake. Firstly, do not cut out fabric when tired and upset. Secondly, when grading between waist and bust and there is a wide underbust band involved, remember to grade the band as well as the upper bust piece! Yes, there was a lot of unpicking involved to take it and correct that one. Whoops!)

Strawberry Milkshake dress | Modern Vintage Cupcakes

As with all patterns, I lowered the bust darts – in this case, by 2cm.

I didn’t have enough fabric to make the dirndl skirt variation of the dress, so instead I extended the skirt out by 8cm on either side at the hem, and angled the side seams to meet, to create a gentle A-line shape. (My walking style is not conducive to wearing straight skirts. Long legs, long strides, seams rip….!) I also added 1″ at the skirt hem because – tall.

Another change – pockets! I added simple in-seam pockets to each side seam. 🙂

Strawberry Milkshake dress | Modern Vintage Cupcakes

The pattern sewed up nicely – quick and easy, with a nice and neat finish where the wide band meets the upper bodice as it’s self faced on the inside. The neck and armholes are finished with bias binding (the pattern has a piece for cutting a self-bias facing, but I didn’t have quite enough fabric so used a purchased pale pink bias binding instead).

Strawberry Milkshake dress | Modern Vintage Cupcakes

I also used a white polyester hem binding on the skirt – normallly I use Hug Snug, but thought I’d branch out this time and try a different type. (It worked fine for the hem, but it’s quite stiff and a bit rough, so I wouldn’t recommend it for seams that sit next to your skin. I’ll be sticking with the lovely soft Hug Snug for those!)

Strawberry Milkshake dress | Modern Vintage Cupcakes

I must admit though, I’m a bit on the fence about the final dress. I’m not 100% sure that it suits me?!? It’s mainly the colour I’m unsure of – is it too pale? (Normally I go for bolder colours, but when viewed from a little bit of a distance, the colours on this kind of blend together into something a lot closer to a pastel shade….)

Strawberry Milkshake dress | Modern Vintage Cupcakes

And another confession – I made another mistake when cutting out, that I didn’t realise right up until the end. (Yep, that lesson again – don’t cut out fabric when distracted!) I forgot to do my usual SBA. *hangs head in shame* And with this style of bodice, that’s even more obvious than usual! So there is far too much fabric in the bust of the front upper bodice. *sigh* I’m currently debating whether to recut the upper front bodice (I think I may have just enough fabric to do that?!) and fix it, or not. What do you think – is the colour and style working enough for me to bother unpicking and fixing? Or should I just give this one up as a lost cause and give it away instead? I have lost perspective on this one due to my annoyance at my own stoopid mistake when cutting out. Gah.

Strawberry Milkshake dress | Modern Vintage Cupcakes

But hey – it’s a summer dress! And there are roses in the background, and I have a big milkshake cup! Yay! 🙂

Strawberry Milkshake dress | Modern Vintage Cupcakes

Mustard Mustang Ranges

Back in June, I took part in the pattern swap organised as part of Indie Pattern Month on The Monthly Stitch. The idea was, we sent an indie pattern to someone, and got one sent to us by someone else – all a complete mystery who was sending to who! We knew which pattern labels the person we were sending to already owned, and were meant to purchase them a pattern from a brand they didn’t own, so we could be sure they wouldn’t already have the pattern we bought them. There were two swaps – one with physical paper patterns, and one with PDF patterns. And since I love patterns, I took part in both. 😉

Mustang Ranges dress | Modern Vintage Cupcakes

For the PDF pattern swap, I got sent the Darling Ranges dress pattern from Megan Neilsen. The Darling Ranges pattern is described as a “modern shirt dress” – it as a deep v neck, no collar, and two key variatons – a button-bodice, high waisted dress with a gathered skirt; or a dartless dress that buttons the whole way down the front.

Even though a dartless (aka shapeless!) dress really isn’t my usual style, I found that I couldn’t get the idea of matching that variation with the mustard coloured Mustangs print fabric from Cotton + Steel that I bought off Fabric.com (my first ever Fabric.com order – that site is very very dangerous!!). The simple lines of the dress seemed like a great way to show off the bold fabric print. So, I went ahead and gave it a go!

Mustang Ranges dress | Modern Vintage Cupcakes

Pattern matching across the front button placket was surprisingly challenging. There were no centre front lines drawn on the pattern, so I had to figure out exactly where things would overlap, and line up from there. Made more difficult as the mustangs are staggered across the fabric, so it all had to be cut out in one layer at a time. I’m really happy with how it worked out though – it’s pretty much perfect! (Except for the inevitable slight pulling of things off-centre when it’s worn. Because, you know, bodies – they move and all that.)

Sadly, there was no way I could ever match the pattern down the side seam – the dartless variation of the Darling Ranges dress is somewhat unusual. It has no darts or shaping at all! The front is cut as an a-line style, and the back is straight. This means the volume to fit over bust and hips comes only from the front of the dress, and the side seams angle from the usual place under the arms to further around the back of the dress. I must admit to scratching my head a bit over that at first, but thought I’d give it the benefit of the doubt and just try it out. *shrug*

Mustang Ranges dress | Modern Vintage Cupcakes

The construction of the dress was pretty straightforward – after all, it’s a pretty simple style! There are inseam pockets at the side seams, the button placket is cut on and simply folded over twice to the inside for a neat finish, and the v neckline has a self-bias facing. I finished the sleeve and skirt hems with Hug Snug seam binding, using a standard straight stitch on the sleeves and a machine blind hem stitch on the skirt.

Mustang Ranges dress | Modern Vintage Cupcakes

With the lack of shaping, I only made one alteration before I started, and lengthened the skirt by 15cm. (Yikes!) In hindsight, I should have altered the shoulder width as well – I was too busy figuring out the pattern matching challenge, and completely forgot to check the shoulder width, and now it’s too narrow on me. Argh! I keep debating whether to take the sleeves off and make it sleeveless, or whether to leave it as it is…. Hmmm…. What do you think I should do?? (So saying, that shoulders are really narrow on this pattern – narrow to the point where I wonder if they’re almost meant to be like that?!? But surely not… The website says her patterns are drafted for someone of a height of 5’9″, which isn’t that much shorter than me, so I wouldn’t expect to have to do more than a 1cm adjustment at most.. Hmmm. Very odd. *shrug*)

Mustang Ranges dress | Modern Vintage Cupcakes

I must admit to finding the final dress a bit odd. If worn without a belt, it looks like a hideous sack on me (not surprising because, hips). And I’m really annoyed with myself about the pulling in the upper bodice due to the shoulders being too narrow. It’s not my usual style, and the pockets don’t sit very well (I think due to the oddly angled side seams?). And yet…. I wear it about once a week. It’s in constant rotation in my wardrobe, and has been ever since I finished it. It’s easy to put on, and I am totally in love with the fabric. So, style-wise it’s not a win, but wearable-wise, it totally is. Go figure. Either way, it’s going to continue getting worn, all year ’round!

Mustang Ranges dress | Modern Vintage Cupcakes

A huge thanks to the lovely sewing person who sent me the pattern as part of a swap – it really was perfect for this fabric, and I have plans to try the other variation of the dress (only with a significant wide shoulder adjustment!) sometime soon. 🙂

Strawberry season!

We’re slowly heading towards summer here. In a two-steps-forward, 1.75-steps-back kind of way, that Wellington does so well. Sun so bright it burns in 8 minutes one day, winter coats and scarfs on again the next. But there is light coming – the days are longer, the weather is (overall) getting warmer, and, best of all, there are strawberries in the supermarkets! Yay!! (I love strawberries. They make me happy. I may have eaten a lot of them already this month. 😉

Which is all a rather long preamble to… this dress!

Strawberry Thief dress | Modern Vintage Cupcakes

Why the preamble? Well, strawberries! The common link. 😉

The fabric here is Strawberry Thief, a William Morris print on a lovely cotton poplin. I got it from Minerva Crafts (as part of their blogger network) – sadly it’s sold out now. I’m hoping they’ll get more William Morris prints in the future – I’ve always loved his designs. So detailed and intricate and full of texture and life. (Maybe one day I’ll get a feature wall in one of his wallpaper designs. Mmmm…. Seems almost perfect for a sewing room, now I think about it. After all, he did a lot for the British textile industry! Right, putting that on my “things to do in the future” list. 😉

Like other William Morris designs, this print is full of intricate detail. Flowers, swirls, points, and birds stealing strawberries. Love it!

Strawberry Thief dress | Modern Vintage Cupcakes

When I spotted this fabric, I just knew it had to be the Sew Over It Vintage Shirt Dress.

And then it arrived, and I must admit – I kinda freaked out a little. I didn’t realise just how large this print would be! The idea of pattern matching it across a shirt dress, yeah. Seemed kinda tricky. Especially with the tucks and the gathers thrown into the mix.

Strawberry Thief dress | Modern Vintage Cupcakes

So I thought about other patterns. I considered making the Sew Over It Betty dress. Or another Cressoway dress. But I thought the print might be almost a bit too overwhelming with a plain bodice. Then I thought about the Grainline Alder dress (another that’s been on my to-make list since last summer!). But that just didn’t seem quite right for this print either.

Eventually, I went full circle – it just really wanted to be the SOI Vintage Shirt Dress.

So I pulled on my big-girl pants, got brave, and set to work. And let me tell you – this took quite a lot of thought!! (It also took 1.5 hours to cut out. That’s how much thought was required.)

Strawberry Thief dress | Modern Vintage Cupcakes

I cut it all in a single layer, so I could best pattern match. There was a lot to consider – how to line things up so the design was running down the centre front and centre back of both bodice and skirt. Making sure there were no accidental pattern placements (giant flower boobs, anyone? Yeah, didn’t think so). Getting the pattern lined up along the centre front seam. All that tricky sort of stuff. Made a good deal trickier by the face I had ordered enough to make the dress, not realising how big the print was. It was pretty touch-and-go as to whether I’d be able to get it cut right, but I just squeezed it in in the end! (Look on the inside, and you’ll see one of the side seams is sewn right next to the selvedge.)

There’s also this little surprise, hidden down one side of the front bodice. Hah!

Strawberry Thief dress | Modern Vintage Cupcakes

I’m pretty happy with my pattern matching though – check that out!

Strawberry Thief dress | Modern Vintage Cupcakes

(Not so happy with my button placement though. I accidently stitched the buttonholes on the wrong side of my marker, so they’re out by a couple of mm. Ugh.)

I had a little mishap while sewing though – I managed to put a rip in the back neckline, just before attaching the collar. Argh!!! Thanks to some Instagram sewing helpers, I calmed down the panic, reinforced with iron-on interfacing, and stitched it together again with a narrow seam. I tried to find some fabric to do an invisible patch with, but didn’t have a piece that would fit the problem area and had the same pattern on it. So, a narrow seam it had to be! Luckily the print is so busy it’s not too noticible when it’s on. (But still – eek!!)

Strawberry Thief dress | Modern Vintage Cupcakes

This is the second time I’ve made this pattern (the first one being in Hello Kitty print), and it went together nice and smoothly. 🙂 I made the same changes as last time – lengthening the bodice by 3cm. It’s actually a little bit short still – next time I’ll lengthen it by 4cm.

I made a couple of other alterations too – I lengthened the skirt by 8cm (now a far better length on me – the other one is just a fraction too short!). I also narrowed the skirt, so I could fit it on the fabric with the pattern placement. I found the armholes of my first one just a little too tight under the arm, so lowered them by 1cm.

Strawberry Thief dress | Modern Vintage Cupcakes

All seams are bound with fushia coloured Hug Snug, and I did a blind hem on my sewing machine. The armholes are finished with red bias binding.

Next time I make this, I’ll be adding side-seam pockets. Because, pockets!

I’m really happy with how this turned out – the skirt length is definitely better for me at this length, and the pattern matching makes me happy – definitely worth the time taken to cut it out slowly! And hey, William Morris print of birds stealing strawberries – that’s a total win! 🙂

Strawberry Thief dress | Modern Vintage Cupcakes

Big thanks to my sister, who took the photos when we went to the zoo. I had to keep ducking to check where the Little Guy was as he ran around playing. Lots of photos like this happened as a result:

Strawberry Thief dress | Modern Vintage Cupcakes

😉

Cressoway! (Dallida?)

It’s time for a mash up! Yeah yeah!!

Pinky bar Cressoway dress | Modern Vintage Cupcakes

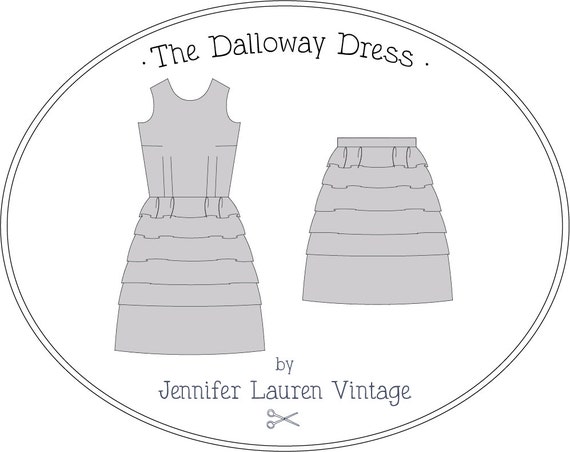
Back in September, I made a dress for Sewing Indie Month using two Jennifer Lauren Vintage patterns – the Dalloway dress and the Cressida skirt. I combined the bodice of the Dalloway with the Cressida skirt to make a cute vintage styled fit-and-flare dress. (And I put together a tutorial on how to do it on Jennifer’s blog. Spoiler alert: it’s a super easy pattern hack.)

Jennifer Lauren Vintage Cressida skirt line drawing

This was my first time making any Jennifer Lauren Vintage patterns, and I have to say, it was a lovely experience! Great instructions, good diagrams, notches that all match up and do what they’re meant to do, and a clean and easy way to line a bodice. I now have my eye on her Enid top pattern to add to my “things to sew” list… 😉

Pinky bar Cressoway dress | Modern Vintage Cupcakes

Jennifer drafts for a D-cup bodice, and I’m an AA, so naturally there had to be a bit of adjusting before I could begin. I chose my size based on high bust measurements then did a 3″ SBA (small bust adjustment) to bring it down to an A cup. Since there were two waist darts, I rotated them into one dart and then did a SBA on the bodice to make it easier. The SBA resulted in the side bust darts and one of the waist darts on the bodice being removed. (A shame, as I really like the double waist dart detail in the Dalloway bodice. But hey, if I’d kept them both, they would have been little more than pintucks. 😉

Here’s my hacked-up bodice post-SBA….

bodice alterations

I also added 1cm of length to the front and back bodice (a common adjustment for me, due to my height.)

Fit adjustments made to the bodice, I started asjusting the Cressida skirt to convert it from a separate with button front opening to a dress skirt with centre back zip. You can find all of these over on the Jennifer Lauren Vintage blog, so I won’t go into the details here as well. (Although if you have any questions, feel free to ask.)

Pinky bar Cressoway dress | Modern Vintage Cupcakes

The other key change I made was leaving out the pockets. (Yes, yes, I know – that decision just seems downright wrong! But there’s a good reason for it – I wanted to leave it easy to take this in at the waist in the future, and the pockets would have made it very hard to do that. So they got left out, and the side seams got stitched up last, rather than the waist seam.)

Pinky bar Cressoway dress | Modern Vintage Cupcakes

I really love the resulting dress – it’s fun and swirly! The Cressida skirt is a semi-circle, which gives a good amount of fullness while not being too nervous about errant breezes (a common wardrobe malfunction here in Wellington. Wonder why wind gets mentioned on Wellington sewing blogs a lot? We’ve just officially been announced the windiest city in the world. Yeah.). I like how the neckline on the Dalloway dips down at the back, and how the bodice is fully lined in an easy and clean way. The combination of patterns results in a dress that’s a good blank canvas for all sorts of fun prints and patterns.

Pinky bar Cressoway dress | Modern Vintage Cupcakes

Speaking of prints and patterns – the fabric I used for this came from Fabric-a-brac a while ago. It’s a cotton, with a lovely mottled pink design all over it. I paired it with a lightweight yellow poplin for the bodice lining, and used yellow Hug Snug to bind all the seams. The hem is finished with Hug Snug and stitched with a blind machine stitch.

Pinky bar Cressoway dress | Modern Vintage Cupcakes

Pinky bar Cressoway dress | Modern Vintage Cupcakes

One thing you may spot that’s a bit odd – the zipper is a super crazy long one. I got given a bunch of these a while back, and it turned out I didn’t have any suitable coloured zips the right length in my stash (considering how many zips I own, I have no idea how this could have happened…). For some reason, I decided that rather than shortening the zip, I’d just make a super long lapped zip. And no, there was no good reason for this decision – I just felt like it. *shrug* So yes, this dress has a lapped zip that goes nearly the whole way down the back. (Can you spot where it ends in the photo below? Please ‘scuse the wrinkles – this dress had already been through High Tea and lots of walking and sitting.)

Pinky bar Cressoway dress | Modern Vintage Cupcakes

The photos for this were taken at the house of one of my fellow members Wellington Sewing Bloggers Network (WSBN), after we went for high tea. We all had outfits to photograph – so much fun when we’re all getting garment photos and egging each other on! 😉 Just for fun, here’s a few behind-the-scenes photos. Including swinging. Because, swings.

Pinky bar Cressoway dress | Modern Vintage Cupcakes

Pinky bar Cressoway dress | Modern Vintage Cupcakes

Pinky bar Cressoway dress | Modern Vintage Cupcakes

Taking photos of Mel in one of her new dresses. 😉

Pinky bar Cressoway dress | Modern Vintage Cupcakes

Mel and Nina in new dresses!

We spotted this on the way to Nina’s house for photos – isn’t is amazing? All covered in wooden lace work, including the fence out the front.

laceHouse

A British Affair

You know how sometimes, you’re just walking along, minding your own business, and all of a sudden a length of fabric simply jumps out of nowhere, wrapping itself around you and demanding to be taken home right that minute? (Even if you have no real idea of what you’re going to do with it after that?)

Yep, this was one of those.

I mean, how could I say no? It’s a vintage-inspired floral, all green and orange and white. And it’s a lovely quality cotton poplin – perfect for all sorts of dresses. (And we all know how much I love dresses by now, right?) Plus (and here’s the real cincher) – there are little Hello Kitty faces peeping out from behind the flowers!!!

Yes, that’s right – Hello Kitty!!!!!

Clearly, it had to be mine. (And it continued to inform me so in a rather loud voice.)

I tried briefly to resist, working to convince both the fabric and myself that, since I had no idea what I was going to do with it, it really had no place in my stash. But really, there was no hope in winning that argument. So, I got two metres, and decided I’d figure out the what-it-will-be details later.

(Why only two metres? Because this is a super-wide fabric! 160cm wide, in fact. Otherwise I would have gone for my more usual 2.5 – 3 metres. Plus I figured it may be a bit over-the-top with that floral to be a dress with sleeves.)

My original plan was to go with the vintage look of the fabric, and turn it into a button-up 1970’s sleeveless dress. Only would you believe it – I couldn’t find any button-up woven dress patterns from the 70’s in my stash!!! (There were, however, a large number of zip-front ones. Guess zips were a Big Thing for dresses back then…)

Then suddenly, it struck me – the Vintage Shirt Dress pattern from Sew Over It. Perfect!

(And it was perfect – I got it out of two metres of this fabric easily, even assuming the print had a direction (I went with way the largest Kitty faces were looking). The cotton poplin is a great quality and the weight worked well with the skirt volume and the shoulder gathers. Plus the rounded collar works well with the vintage vibe of the fabric, don’t you think?)

British Kitten dress | Modern Vintage Cupcakes

With fabric and pattern both from the UK, this had turned into a rather British vintage-inspired affair. 😉

This was my first time using a Sew Over It pattern. I nabbed this one in PDF format when it was launched – I’ve been wanting to try one of their patterns for a while, and a button-up fit-and-flare style shirt dress will always find a home in my wardrobe.

British Kitten dress | Modern Vintage Cupcakes

Overall, I found this to be a great pattern. Reasonably simple, with some cute touches, like the rounded collar and the light gathers into the shoulder yokes. It’s the sort of pattern that lets the fabric be the star of the show, while still being fun and interesting to make.

British Kitten dress | Modern Vintage Cupcakes

I did have a couple of “what the heck?” moments when printing and assembling the PDF. There are two files with the pattern on them – Pattern 1 and Pattern 2. I assumed they related to the two variations of the pattern, so just printed the second file since I was making variation two of the dress. Nope – you need to print both, as it turns out. There wasn’t anything in the instructions about that, nor was there a diagram or table or the like saying what pages each pattern piece was on. Which was a shame, as I like to save paper and only print the pages I need, and in this case I had to print the whole thing, including the full sleeve piece. Ah well.

The other “what the heck?” moment I had came when looking at the actual PDF pages. Each of the pages has edges from the surrounding pages printed on it as well. Which isn’t a problem at all, by the way – I just found it a bit unexpected and had a moment of worrying if there was something wrong with my printer settings printing partial pages!

British Kitten dress | Modern Vintage Cupcakes

Now, the other thing you may want to watch out for is when you’re cutting out the bodice. There are dots that show where the gathering is. There are slightly different lines for the sleeveless vs. the sleeved version, and the gather marker dots are printed on the line for the sleeved version – if you’re making the sleeveless version, make sure you transfer these down down to the right point.

When cutting out the dress, I went for a size 10 bust, grading out to a size 12 waist and hip. (My measurements put me at a size 14 for waist/hip, but the finished measurements for that size had more ease than what I like, so I sized down.) I used the skirt length from size 20, and added a little bit to the length by turning up a 1.5cm hem, rather than the 4cm one called for. I also added 3cm to the length of the bodice, at front and back. (For reference, I added quite a lot less length to the skirt than I usually do for indie patterns, and quite a bit more length to the bodice.)

The dress came together nicely. There are released tucks for shaping at front and back waists, on both the skirt and the bodice. The armholes are finished with bias binding. And the front has a facing all the way along it.

British Kitten dress | Modern Vintage Cupcakes

(Going with what seems to be a current trend for me at the moment, I finished the seam allowances and edges with some yellow seam binding.)

British Kitten dress | Modern Vintage Cupcakes

The hem was done using a blind hem stitch on my sewing machine, and again some more yellow Hug Snug seam binding.

British Kitten dress | Modern Vintage Cupcakes

The instructions were fine and clear to follow. I couldn’t spot a key for the fabric/garment shading, but it’s easy enough to figure out, and I liked the cute touch of the right side of the fabric on the garment being patterned as though it was a vintage floral. 🙂

One thing I did notice that was missing is that the collar pattern piece doesn’t have instructions on it to cut one in interfacing as well – so you’ll need to remember to do that.

British Kitten dress | Modern Vintage Cupcakes

I’m really happy with the final dress – I like the fit. It’s got a little bit of blousiness in the bodice back, as a result of the released tucks there, which is a bit different. The rounded collar makes me smile. 🙂 And the ease at the waist is just how I like it, so going down a size based on the finished measurements worked out well for me.

(It’s also a bit more vibrant than it looks in these photos – tricky early-morning light with sneaky photos before I went to work. Hah! Spring is on it’s way!)

There we have it folks – one dress, with little Hello Kitty faces hidden in plain sight all over it! (How to get away with wearing Hello Kitty to the office? I wore this dress to work on Thursday and no one noticed the kitty faces. Hah! Stealth Kitty!!)

Summary

  • Pattern: Vintage Shirt Dress by Sew Over It
  • Fabric: Hello Kitty cotton poplin
  • Size made: 10 bust, grading to a 12 at waist/hips. (Body measurements put me at a size 14 waist/hips, but I went down one size at waist to have less ease, as per personal preferenace.)
  • Alterations made: lengthened front and back bodice by 3cm; cut out longest version of the skirt and only turned up a 1.5cm hem
  • Things to watch out for: if making the PDF pattern, print both pattern files; if making the sleeveless version, transfer markings for gathering down from where they’re located on the sleeved version; cut out one interfacing for the collar
  • Things I’d change next time: add another 0.5cm of length to front and back bodice; remove some of the fullness at the back bodice by lessening the width of the release tucks
  • Final verdict? Love it! Fits well, fun to make and wear, and will definitely make it again

British Kitten dress | Modern Vintage Cupcakes